dnsproxy (DoH)
Configuring DNS-Over-HTTPS using dnsproxy
This guide shows how to install the dnsproxy tool (created by AdguardTeam).
These steps where tested on a Ubuntu Server 22.
But should work on any Linux distributionm, maybe with some minor changes.
Installing dnsproxy
You just need to download it from the releases page. Choose your architecture and download the binary.
For this guide we will use the dnsproxy-linux-amd64-v0.61.1.tar.gz binary available at https://github.com/AdguardTeam/dnsproxy/releases/download/v0.61.1/dnsproxy-linux-amd64-v0.61.1.tar.gz
wget https://github.com/AdguardTeam/dnsproxy/releases/download/v0.61.1/dnsproxy-linux-amd64-v0.61.1.tar.gz
tar -zxvf dnsproxy-linux-amd64-v0.61.1.tar.gz
mv linux-amd64/dnsproxy ./
Configuring dnsproxy to run on startup
-
Copy the
dnsproxybinary to/usr/bin:sudo cp ./dnsproxy /usr/bin/ -
Create a
dnsproxyuser to run the daemon:sudo useradd -s /usr/sbin/nologin -r -M dnsproxy -
Allow the
dnsproxyuser to run thednsproxybinary:sudo chown dnsproxy:dnsproxy /usr/bin/dnsproxy -
Create a service file for
dnsproxy:sudo nano /etc/systemd/system/dnsproxy.serviceAnd copy the following into
/etc/systemd/system/dnsproxy.service. This will control the running of the service and allow it to run on startup:[Unit] Description=DNS Proxy over HTTPS After=syslog.target network-online.target [Service] Type=simple User=dnsproxy ExecStart=/usr/bin/dnsproxy -l 127.0.0.1 -p 5353 -u https://cloudflare-dns.com/dns-query -u https://dns.google/dns-query Restart=on-failure RestartSec=10 KillMode=process [Install] WantedBy=multi-user.target -
Enable the
systemdservice to run on startup, then start the service and check its status:sudo systemctl enable dnsproxy sudo systemctl start dnsproxy sudo systemctl status dnsproxy -
Now test that it is working! Run the following
digcommand, a response should be returned similar to the one below:$ dig @127.0.0.1 -p 5353 example.com ; <<>> DiG 9.18.12-0ubuntu0.22.04.3-Ubuntu <<>> @127.0.0.1 -p 5353 example.com ; (1 server found) ;; global options: +cmd ;; Got answer: ;; ->>HEADER<<- opcode: QUERY, status: NOERROR, id: 45290 ;; flags: qr rd ra ad; QUERY: 1, ANSWER: 1, AUTHORITY: 0, ADDITIONAL: 1 ;; OPT PSEUDOSECTION: ; EDNS: version: 0, flags:; udp: 1232 ;; QUESTION SECTION: ;example.com. IN A ;; ANSWER SECTION: example.com. 79150 IN A 93.184.216.34 ;; Query time: 20 msec ;; SERVER: 127.0.0.1#5353(127.0.0.1) (UDP) ;; WHEN: Thu Jan 11 18:28:05 UTC 2024 ;; MSG SIZE rcvd: 56
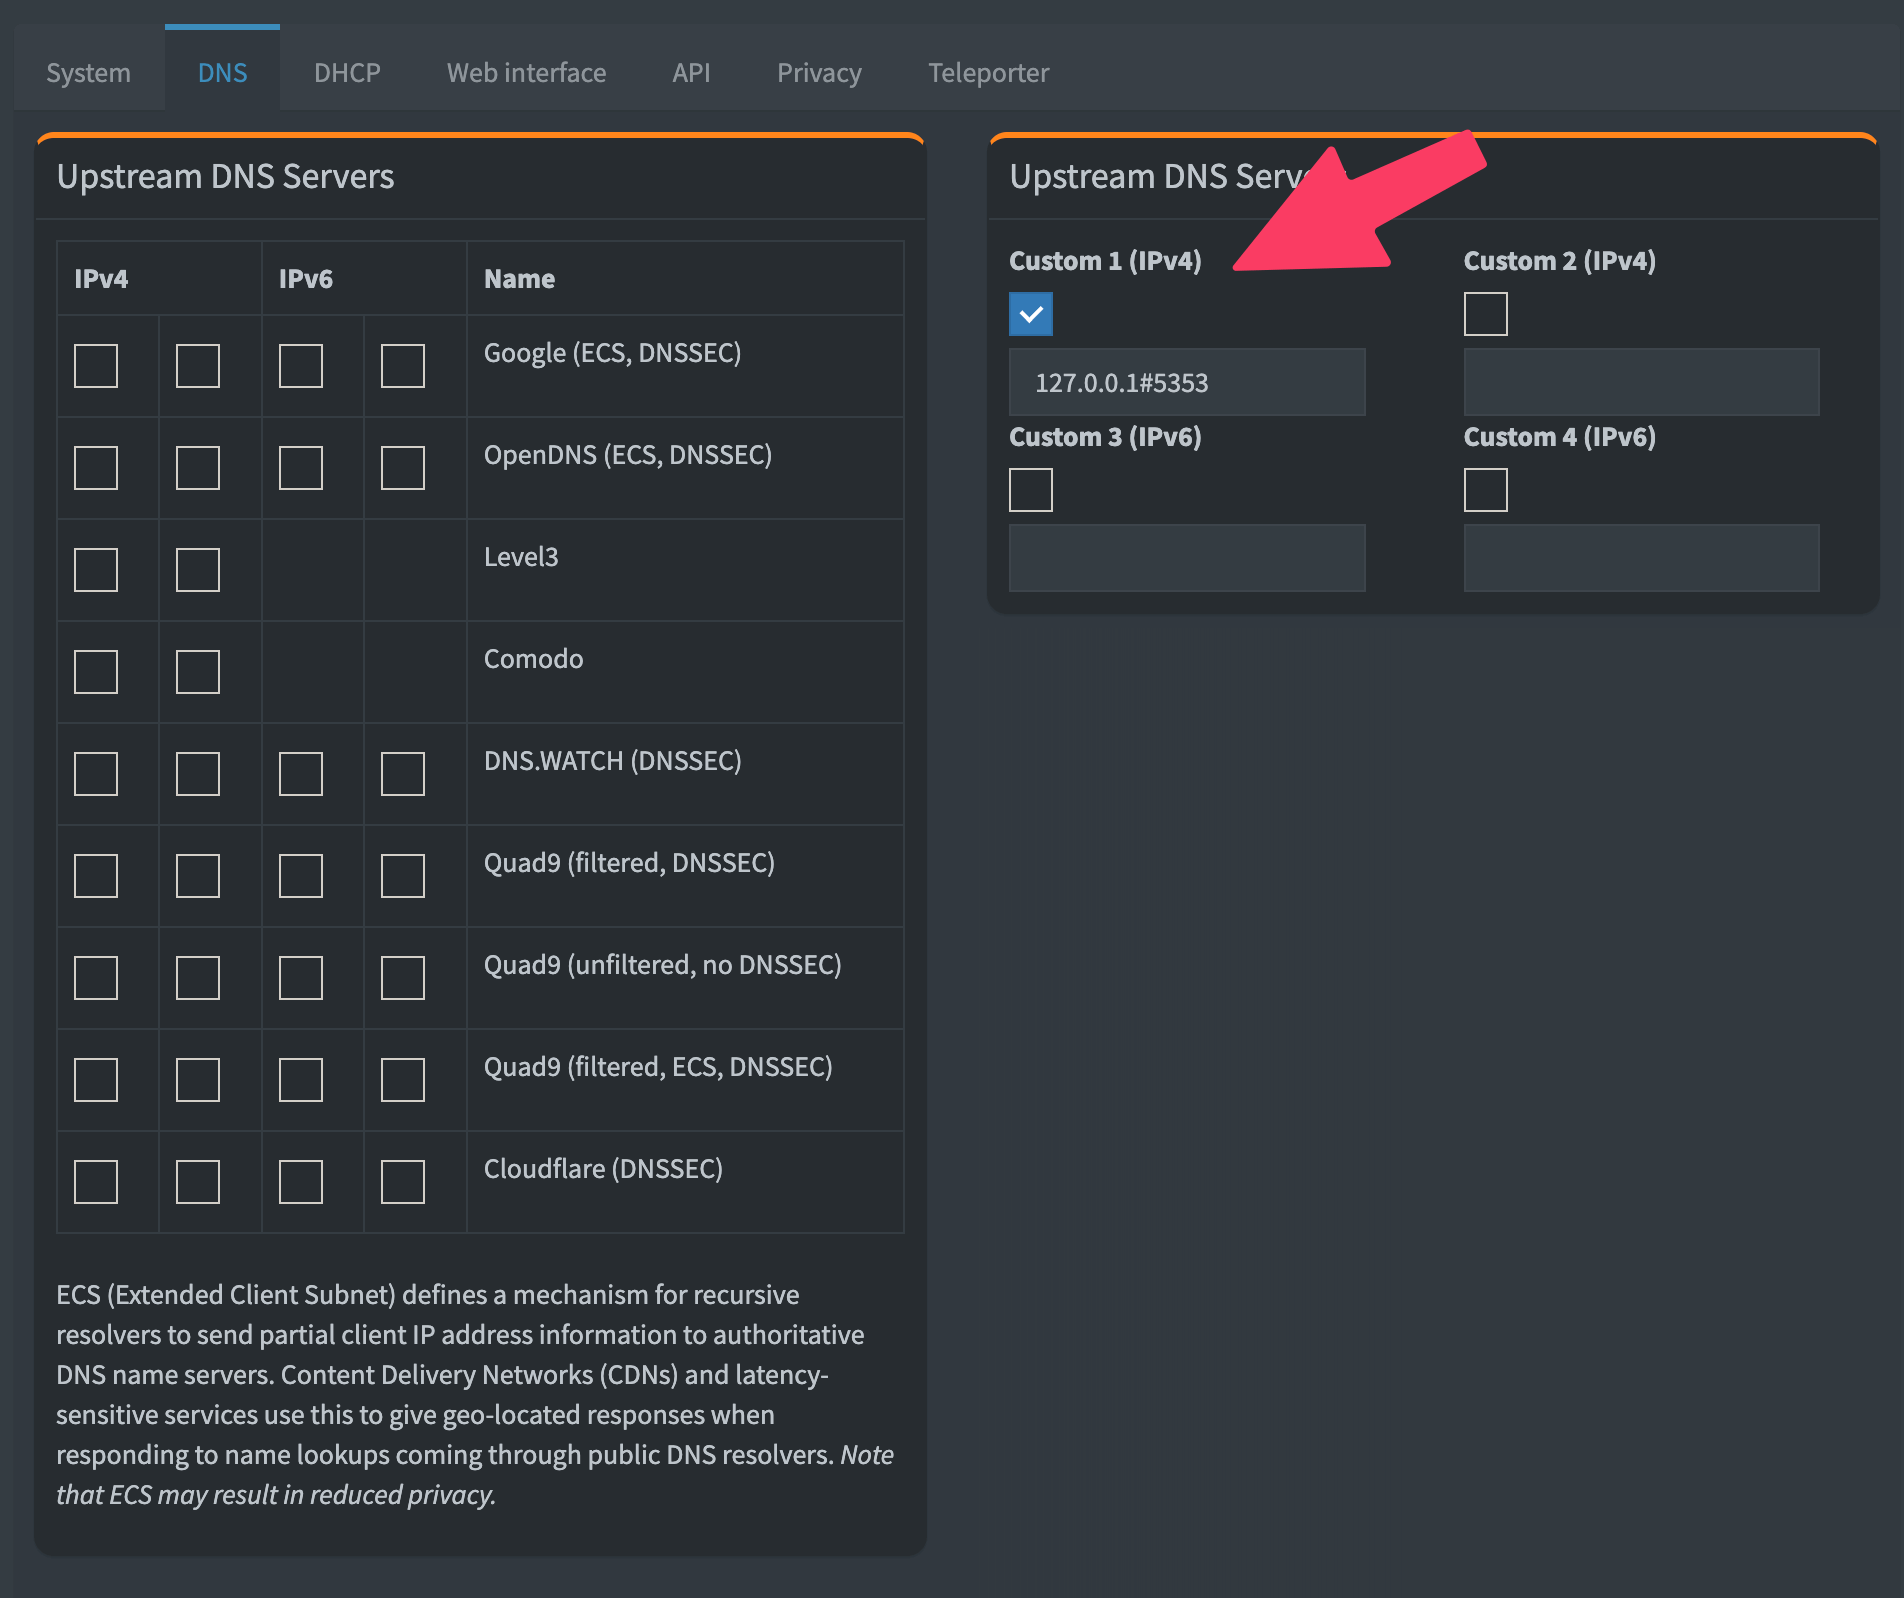
Configuring Pi-hole
On the Pi-hole web interface, go to Settings > DNS and set the following:
Uninstalling dnsproxy
sudo systemctl stop dnsproxy
sudo systemctl disable dnsproxy
sudo systemctl daemon-reload
sudo deluser dnsproxy
sudo rm /usr/bin/dnsproxy
Guide based on the cloudflared guide from the Pi-hole documentation.